
Demos#
These recordings run the real CLI. They use the same VHS theme, dimensions, and terminal font as conda-workspaces’ demos. No agent is launched, and no package is published.
Install from skill-forge#
The recording starts with the plugin installed and an empty temporary project. It downloads agent-skill-polars==0.0.8 from skill-forge, previews its instructions, and creates and removes a project link. It uses libmamba in the recording shell, as the command below shows.
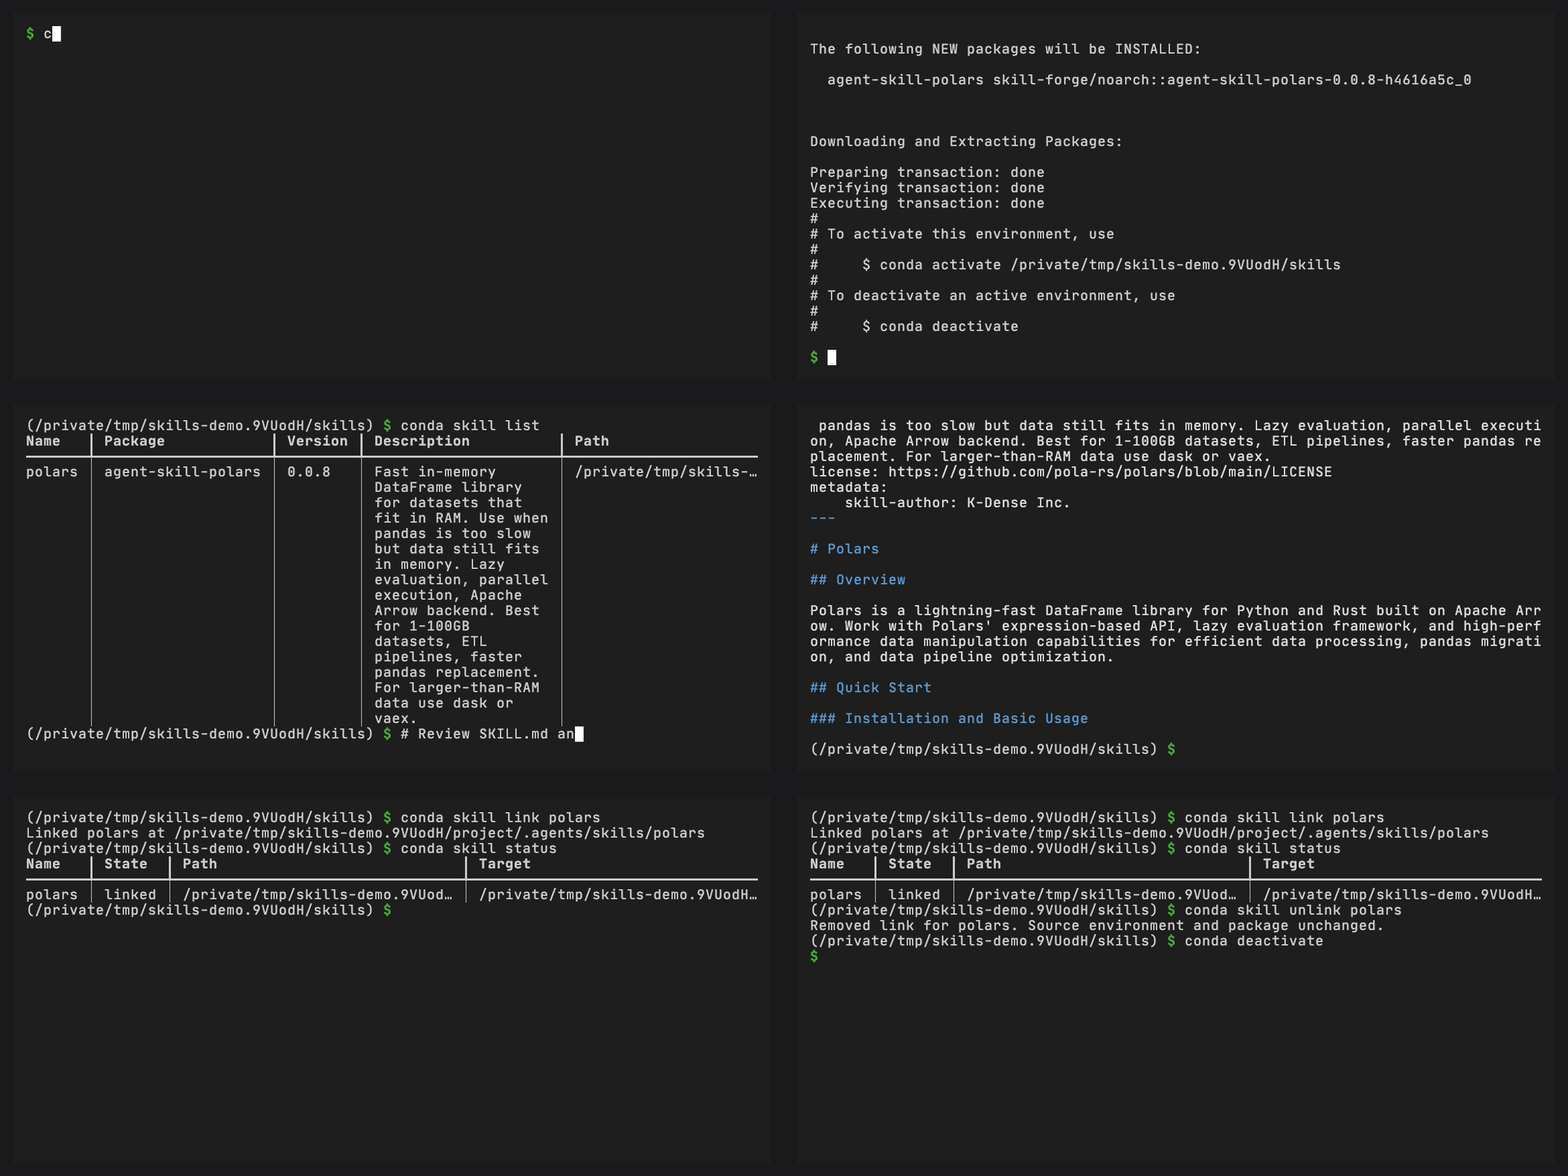
Text equivalent, from a new temporary project with conda shell integration enabled. The recording creates its source at an explicit sibling path so it cannot select an unrelated named environment:
conda create --yes --solver libmamba --prefix ../skills --override-channels -c https://prefix.dev/skill-forge "agent-skill-polars==0.0.8"
conda activate ../skills
conda skill list
bat --paging=never --line-range 1:18 "$CONDA_PREFIX/share/agent-skills/polars/SKILL.md"
conda skill link polars
conda skill status
conda skill unlink polars
conda deactivate
This version has no runtime dependencies, so the recording only needs the skill-forge channel. The tutorial also includes conda-forge for packages that need it. Only 18 lines are previewed here. Read the complete instructions and supporting files before linking a skill yourself. Bat is optional: an editor works too. Follow Try your first skill for setup and cleanup.
The demo environment is removed when the recording ends. The active environment supplies the source for list and link, so neither needs -p. The written tutorial uses an explicitly unused environment name instead. Unlinking works from the destination independently of the active environment. Package removal remains a separate conda command.
Inspect before linking#
This recording starts with the local example package installed in an active, temporary environment. It shows the owning package and file tree, reads SKILL.md, then reads a supporting checklist before creating a project link. The checklist is part of the built package, not a file added only for the recording. File previews highlight the source without hiding Markdown syntax or link destinations.
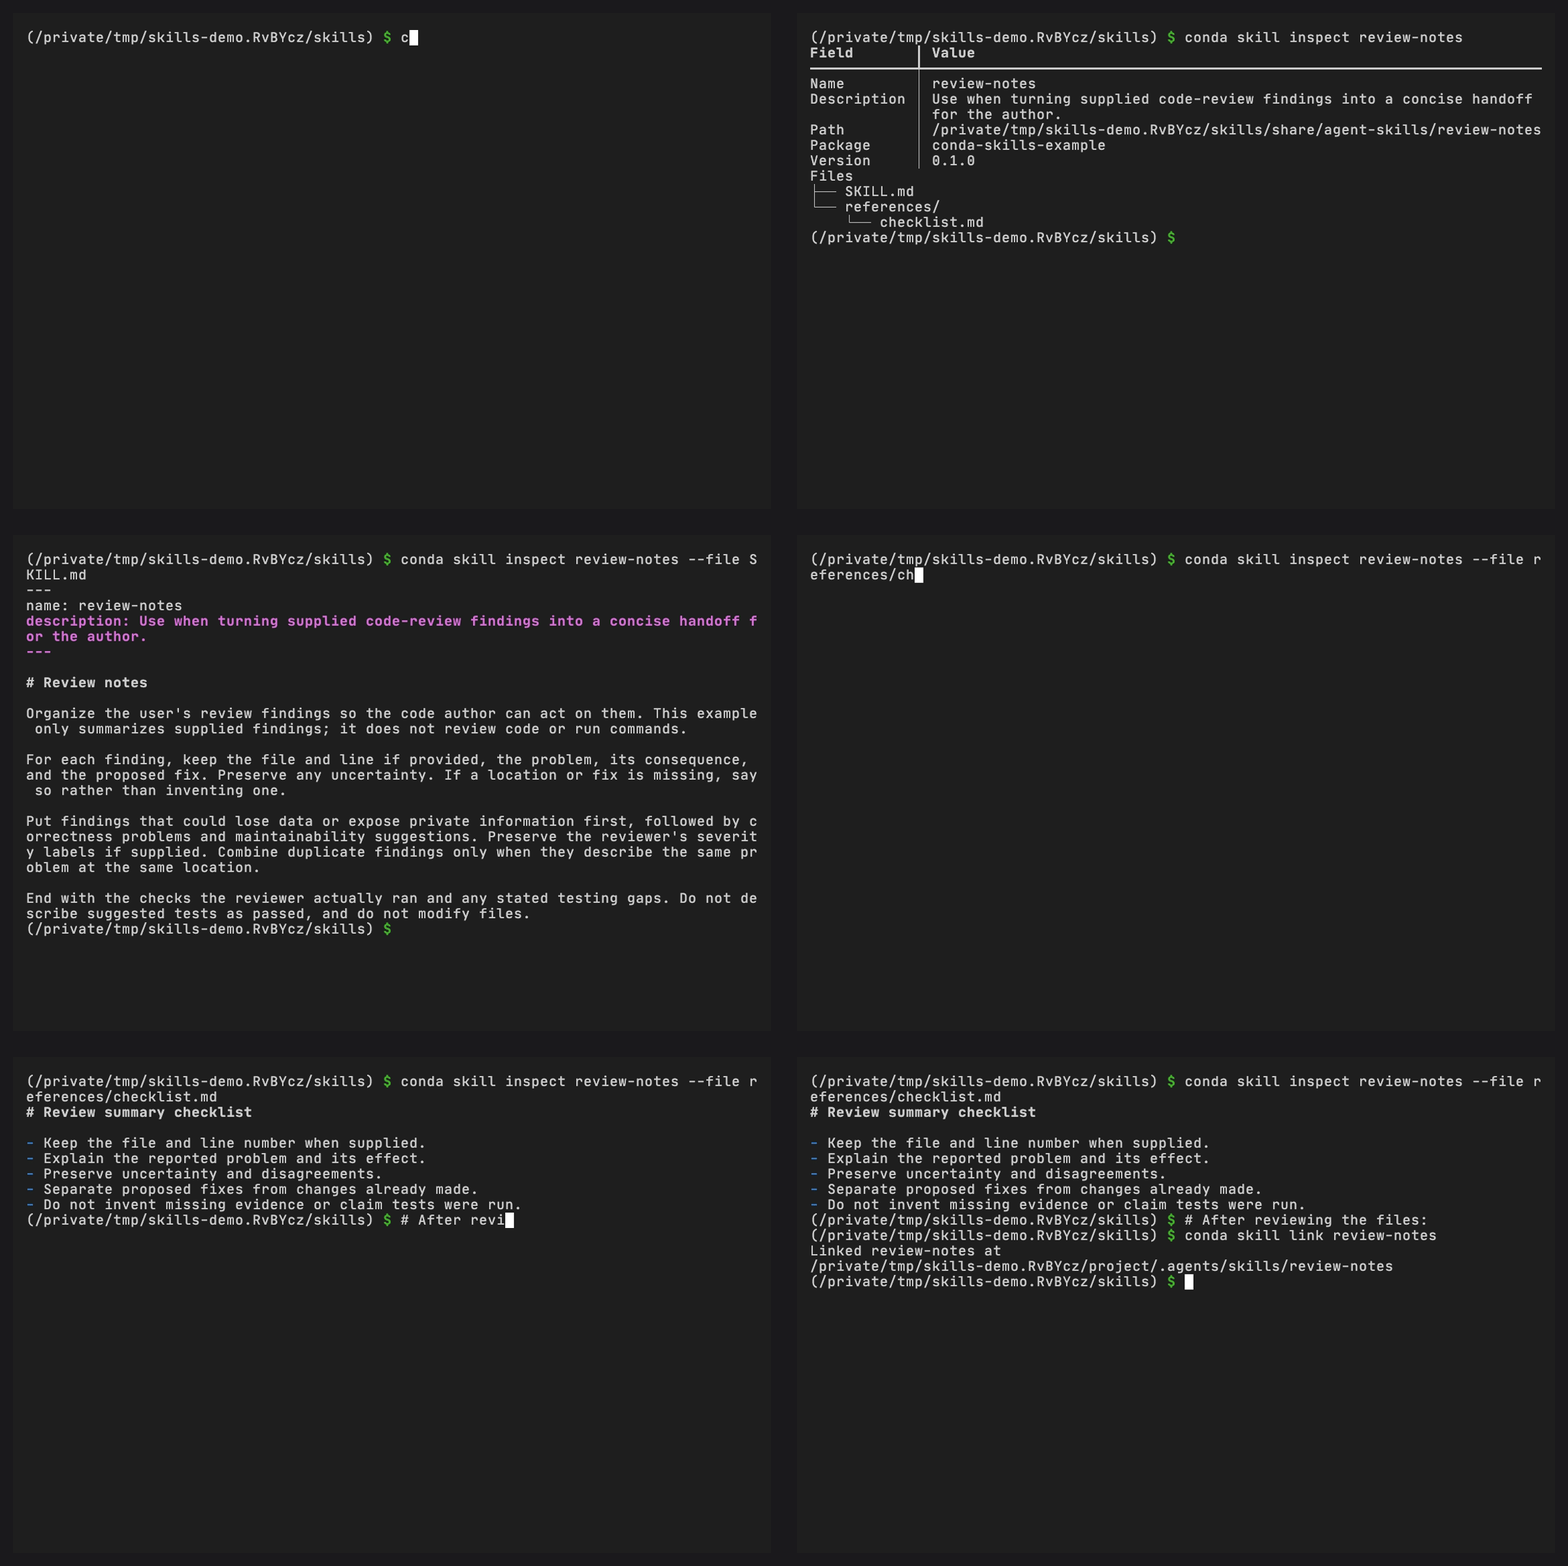
With the example’s source environment active:
conda skill inspect review-notes
conda skill inspect review-notes --file SKILL.md
conda skill inspect review-notes --file references/checklist.md
# After reviewing the files:
conda skill link review-notes
To review the same directory in your usual tools, run conda skill open review-notes. This requests a system file-manager window, which is not shown in the terminal recording. It opens the directory, never an individual packaged file. See Use an installed skill for source selection and Command reference for preview limits.
Reproduce project skills#
This manifest is already written in a temporary project. Conda-workspaces and conda-skills are installed in the tooling environments. The skills environment contains only the skill package.
[workspace]
name = "project-skills"
channels = ["https://prefix.dev/skill-forge", "conda-forge"]
platforms = ["linux-64", "osx-arm64", "win-64"]

[feature.skills.dependencies]
agent-skill-polars = "==0.0.8"

[environments]
skills = ["skills"]
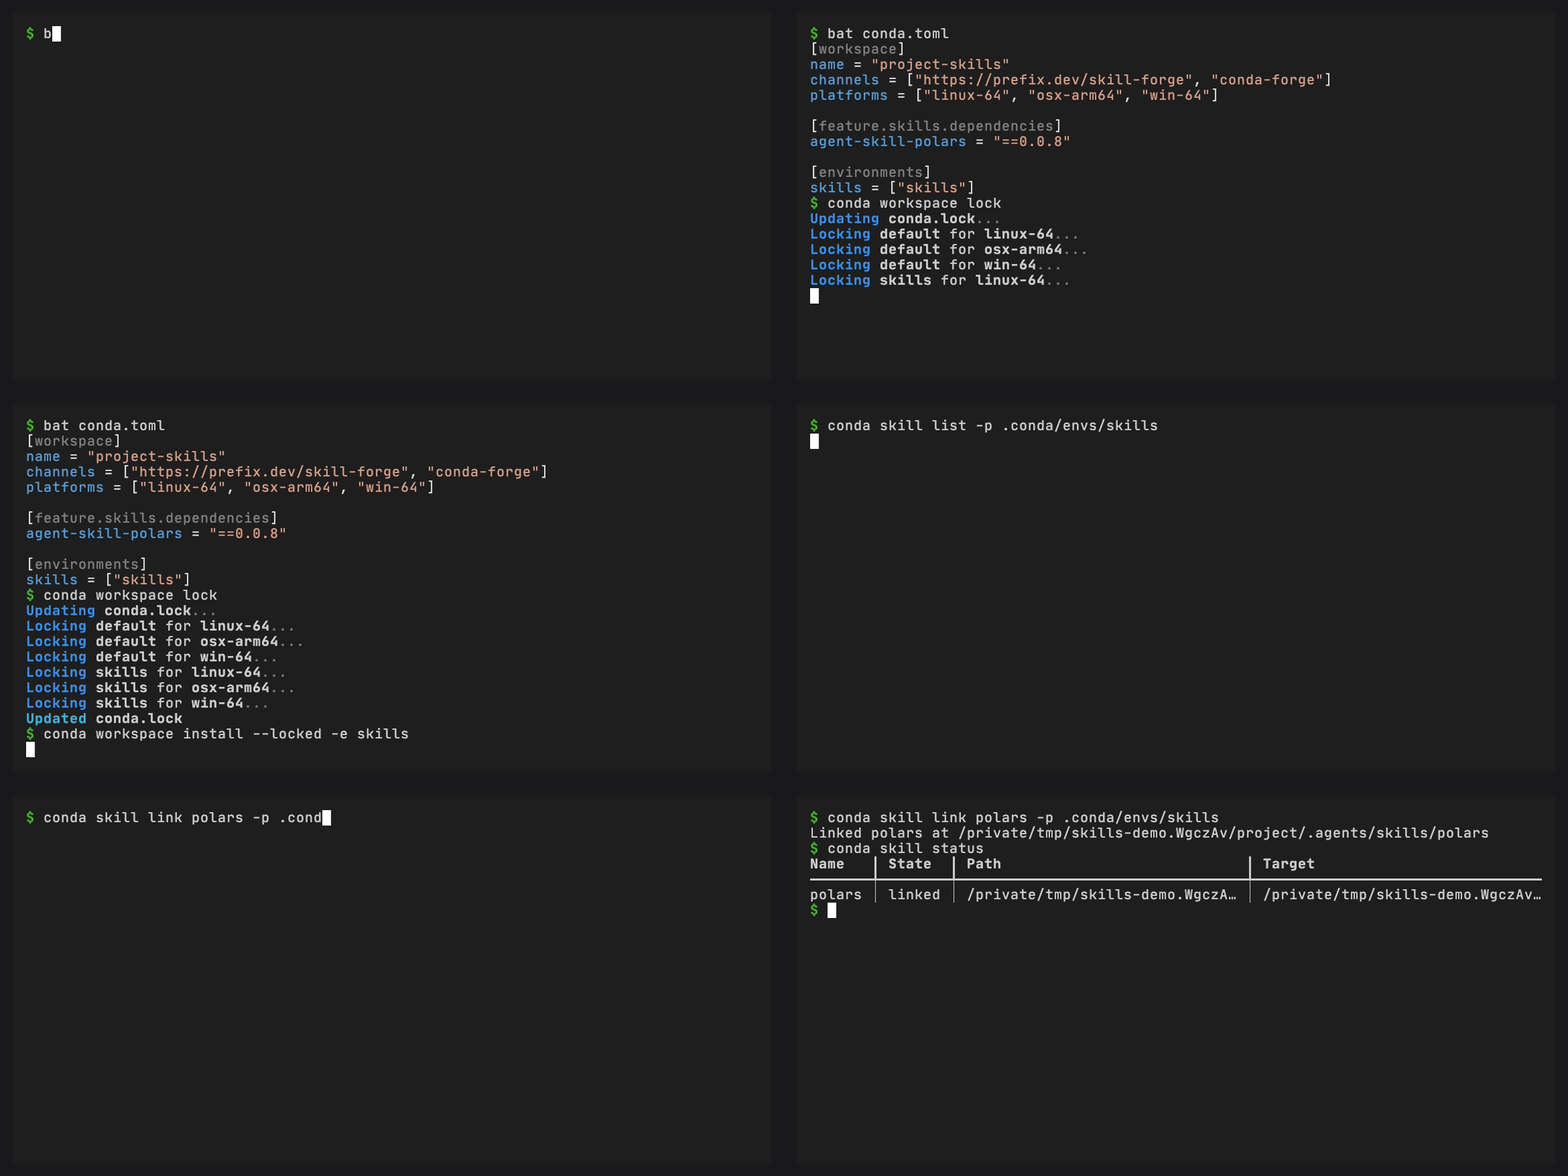
Text equivalent:
conda workspace lock
conda workspace install --locked -e skills
conda skill list -p .conda/envs/skills
conda skill link polars -p .conda/envs/skills
conda skill status
The recording uses CONDA_SOLVER=libmamba in its temporary shell and omits the file-review step. Read the skill before linking it yourself. The lock includes Linux, macOS ARM64, and Windows records, but the commands run only on macOS. See Share skills with conda-workspaces for setup and sharing, and Update or roll back a skill for changes to the locked versions.
Recover a broken link#
The local example package is installed and linked before recording. Moving that source environment makes the link stale. The recording inspects the link, removes only that symlink, then recreates it against the relocated source.
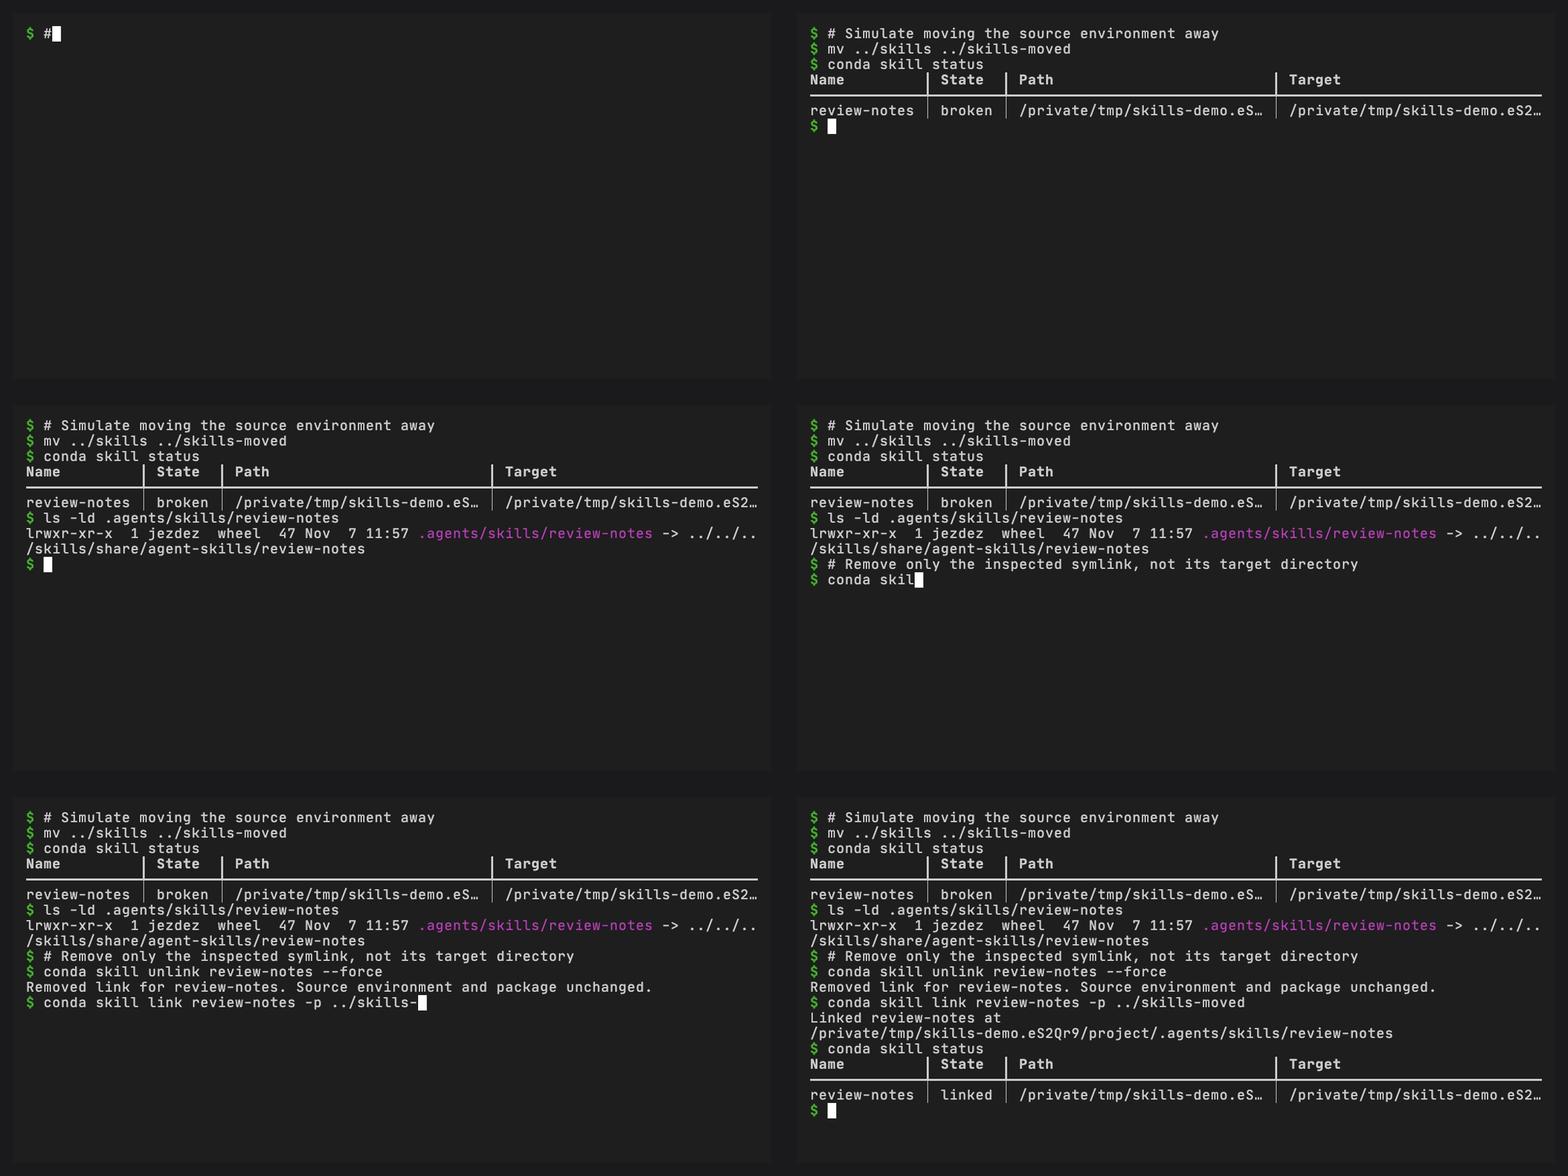
The POSIX commands are:
mv ../skills ../skills-moved
conda skill status
ls -ld .agents/skills/review-notes
conda skill unlink review-notes --force
conda skill link review-notes -p ../skills-moved
conda skill status
The mv deliberately breaks a link to a temporary, data-only environment. Do not use it to relocate a general conda environment: executables may embed their original path. In a real incident, restore the source or recreate the environment at its intended path. Inspect the exact symlink before using unlink --force: the override skips source verification but still refuses regular files, directories, and redirected parent directories. It never removes the package. See Troubleshooting for recovery options and PowerShell instructions.
Use an installed skill#
The example package is built and installed in a temporary environment before recording. The commands list and review the skill, create and inspect its project link, then remove the link. The installed package stays in place.
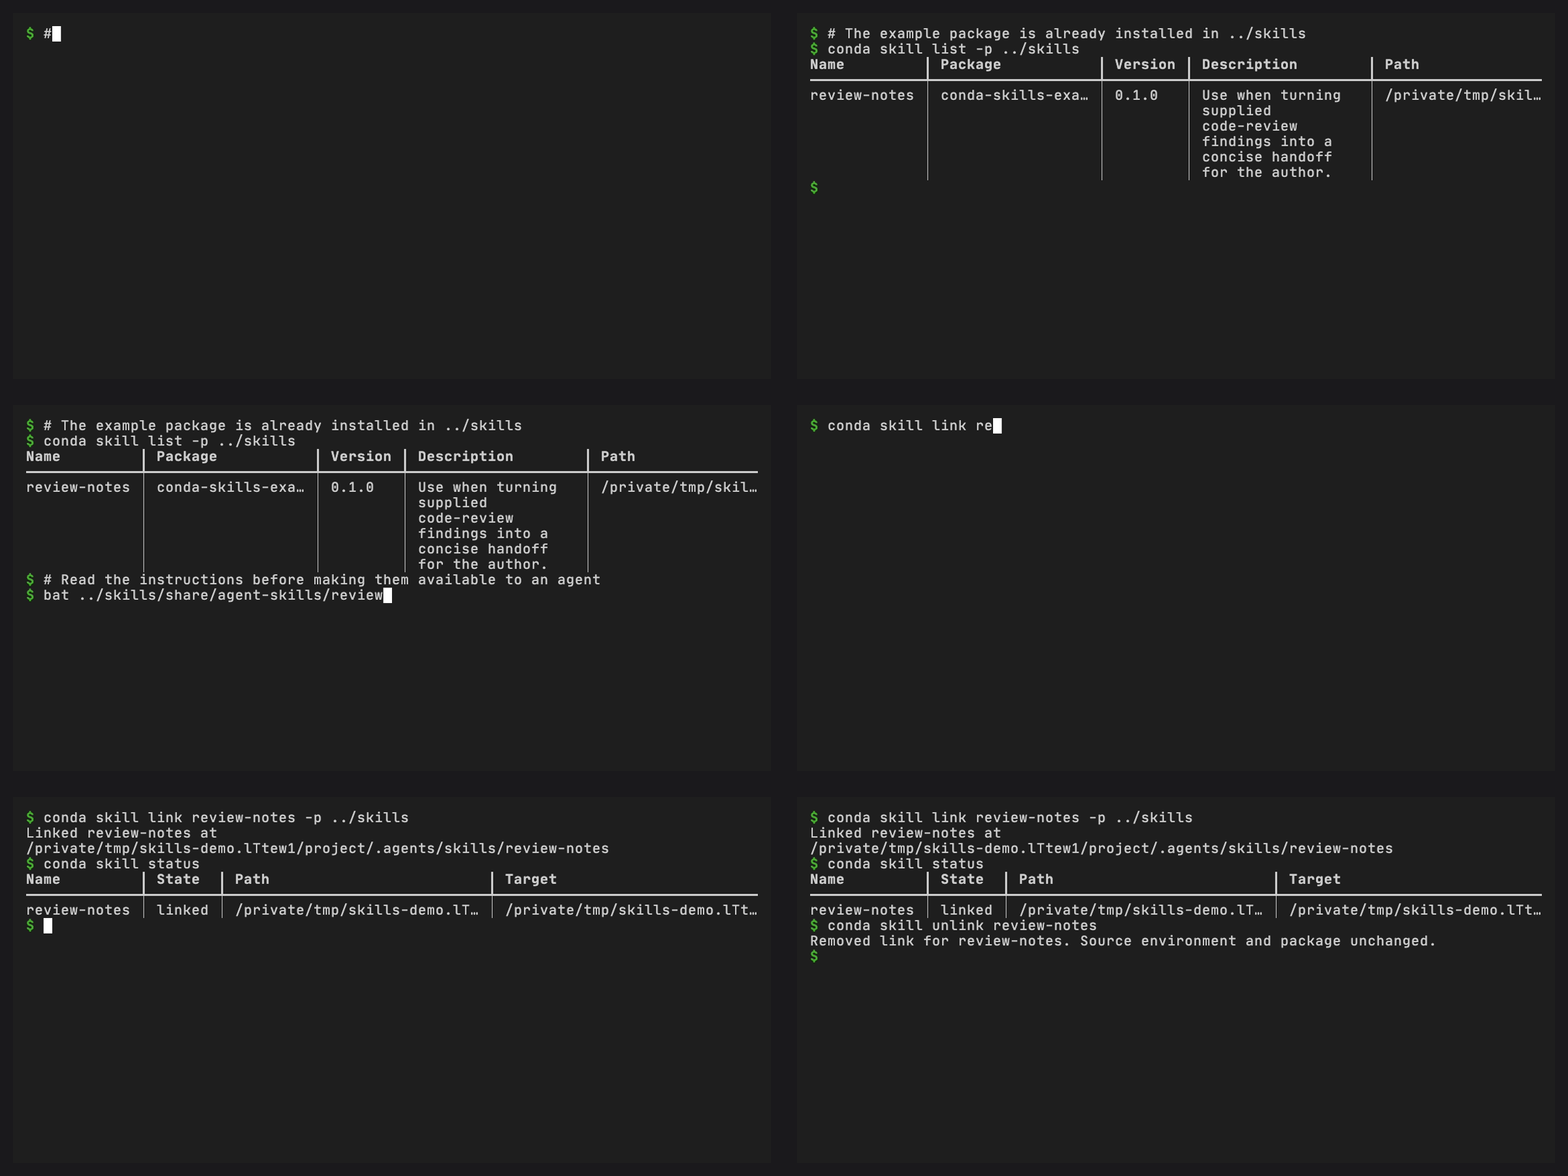
After installing the package in ../skills, run the following commands. Bat’s flags are included so you do not need the recording’s shell configuration:
conda skill list -p ../skills
bat --paging=never --style=plain ../skills/share/agent-skills/review-notes/SKILL.md
conda skill link review-notes -p ../skills
conda skill status
conda skill unlink review-notes
For a guided exercise that includes building the example package, follow Build and try a skill package. If your package is already installed, use Use an installed skill.
Create a skill with the guide#
The interactive guide collects a name and description, previews the destination, and asks before writing. The result is a starting point for your instructions and recipe. It does not install a package or make the new skill available to an agent. You still write the instructions, with less setup to do first.
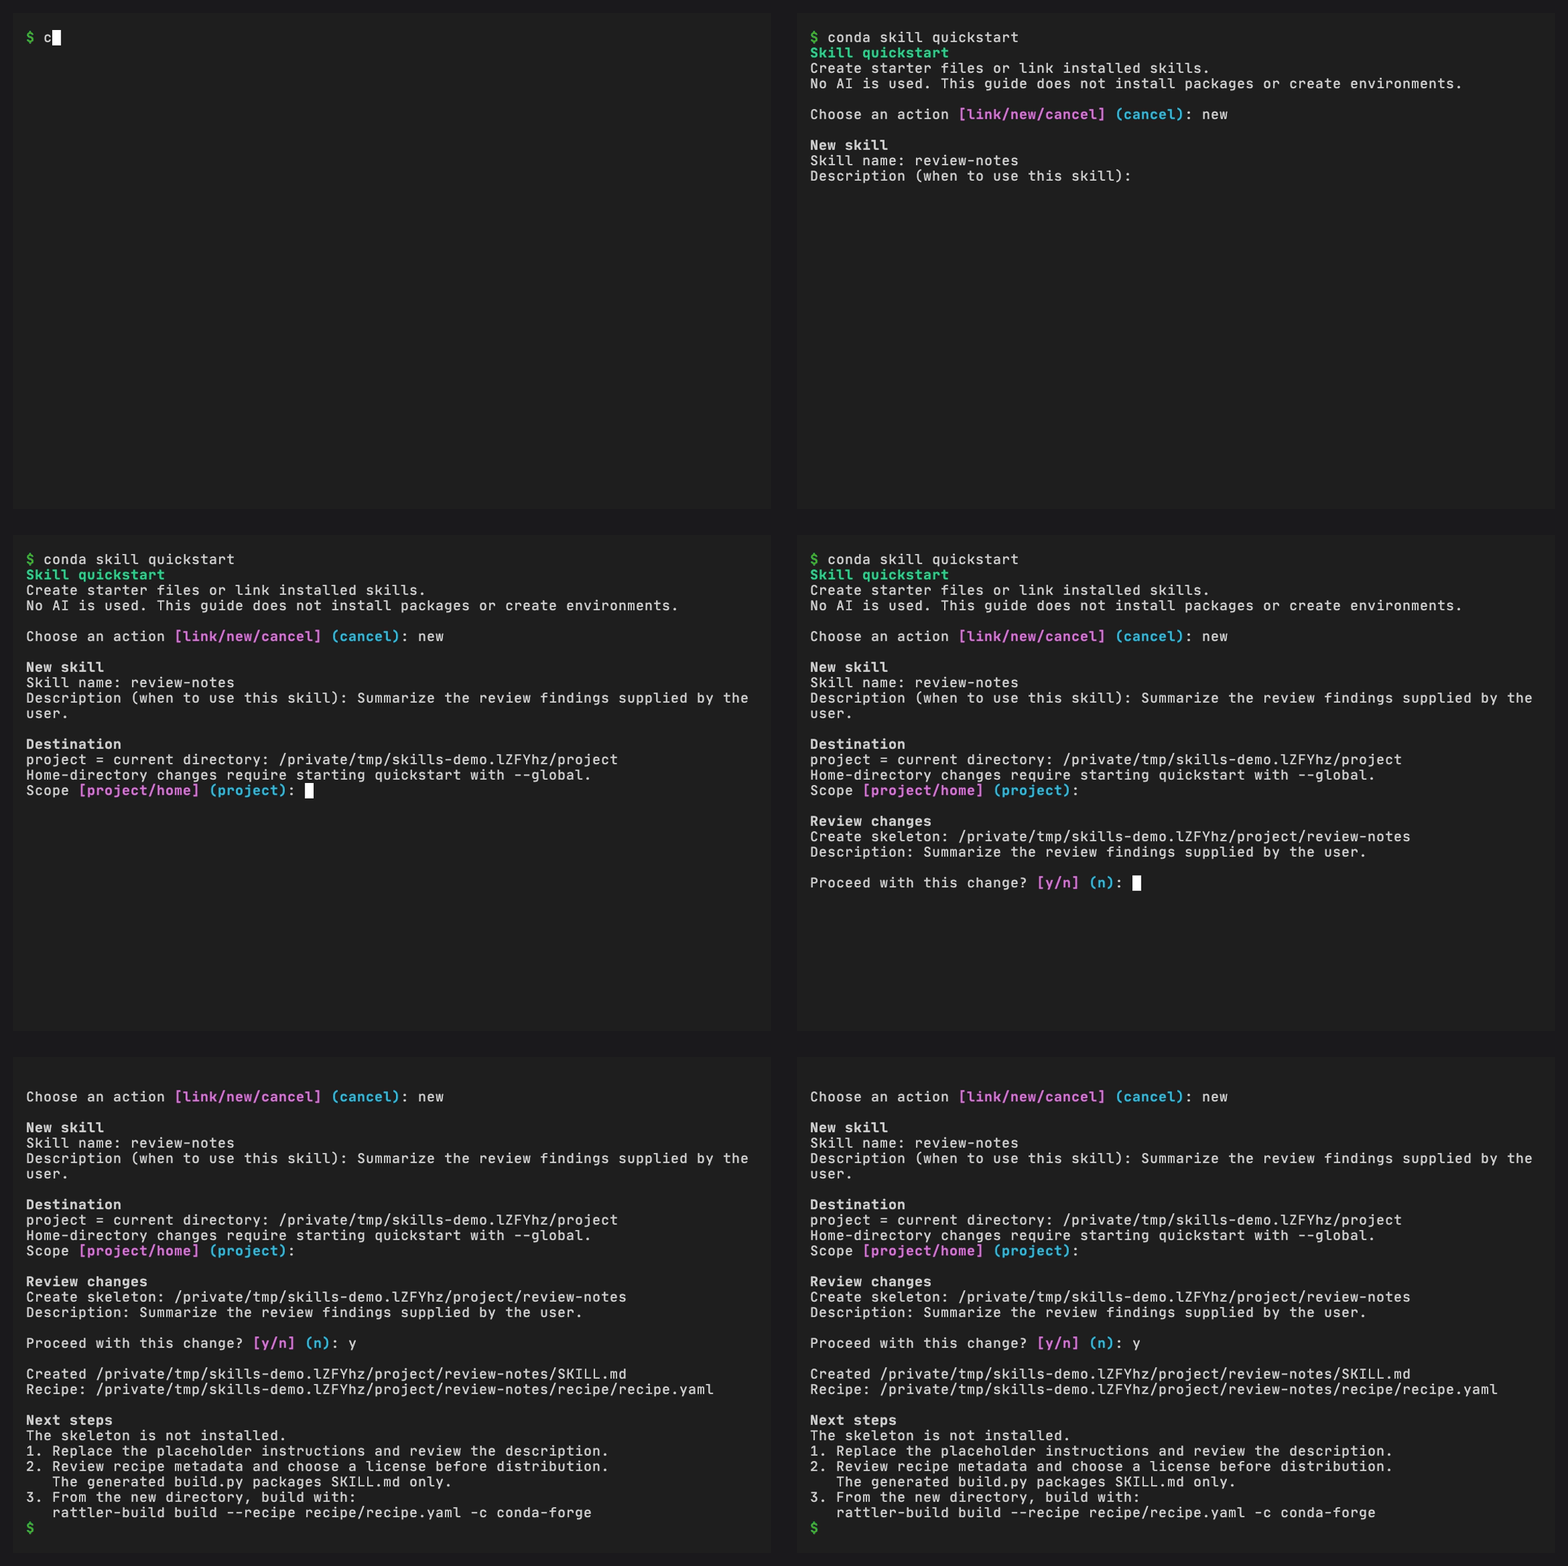
Text equivalent:
conda skill quickstart
Choose new, enter review-notes and a description, choose project, then confirm. For scripts, the equivalent file-generation command is:
conda skill init review-notes --description "Summarize the review findings supplied by the user."
Continue with Create a skill. The recordings show macOS terminal behavior. For Windows symlink permissions, see Troubleshooting.